Introduction
In the previous post, we took a closer look at the fundamental components of Kubernetes and examined its architecture. This time, we’ll concentrate on the essential aspects of Kubernetes networking, including how containers and pods communicate within a cluster and the role of the Container Network Interface (CNI). Our objective is to deliver clear and concise insights into the basic principles of Kubernetes networking, equipping you with a deeper comprehension of the subject. So, let’s explore the foundation of Kubernetes networking together.
Kubernetes Basic Network
Communication between containers in the same pod
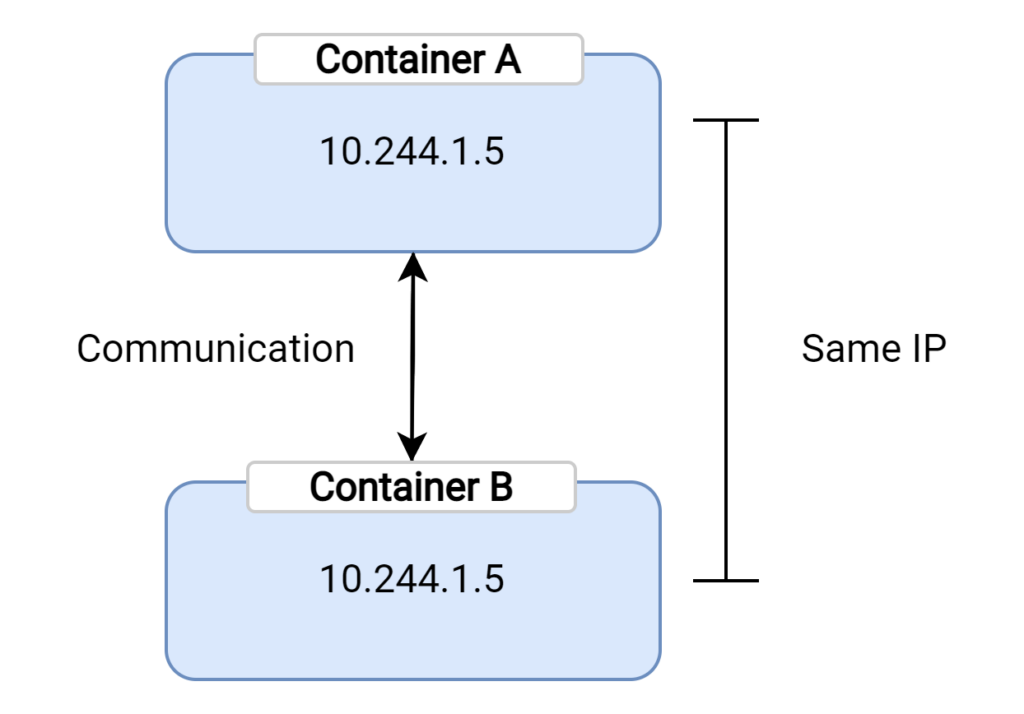
In Kubernetes, the fundamental unit for deploying and managing applications is the pod. A pod can house one or more containers that are built to work closely with each other. These containers within a single pod share the same network namespace, which means they all utilize the same IP address. This shared IP address enables efficient communication between the containers since they can simply use localhost to connect with one another.
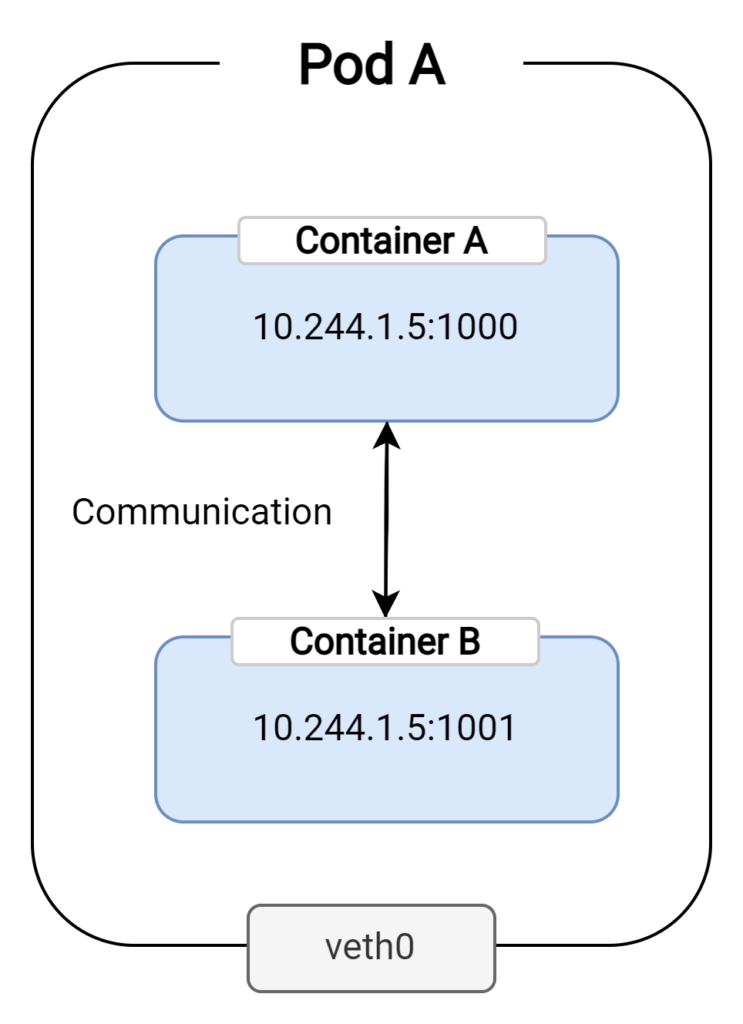
However, because all containers within a pod share a single IP address, it is necessary to distinguish them by assigning unique port numbers. When you configure a container, you can allocate a specific port number for its application, making it accessible through that designated port. This setup enables transparent communication between various applications running within the same pod, without requiring any external networking solutions.
Communication between pods
When discussing communication between pods, it’s important to first understand the concept of veth (virtual ethernet) pairs. These are virtual network interfaces that operate in pairs, with one end attached to a pod’s network namespace and the other end attached to the host network namespace. Any traffic sent through one end of the veth pair is received on the other end, effectively establishing a communication link between the two namespaces.
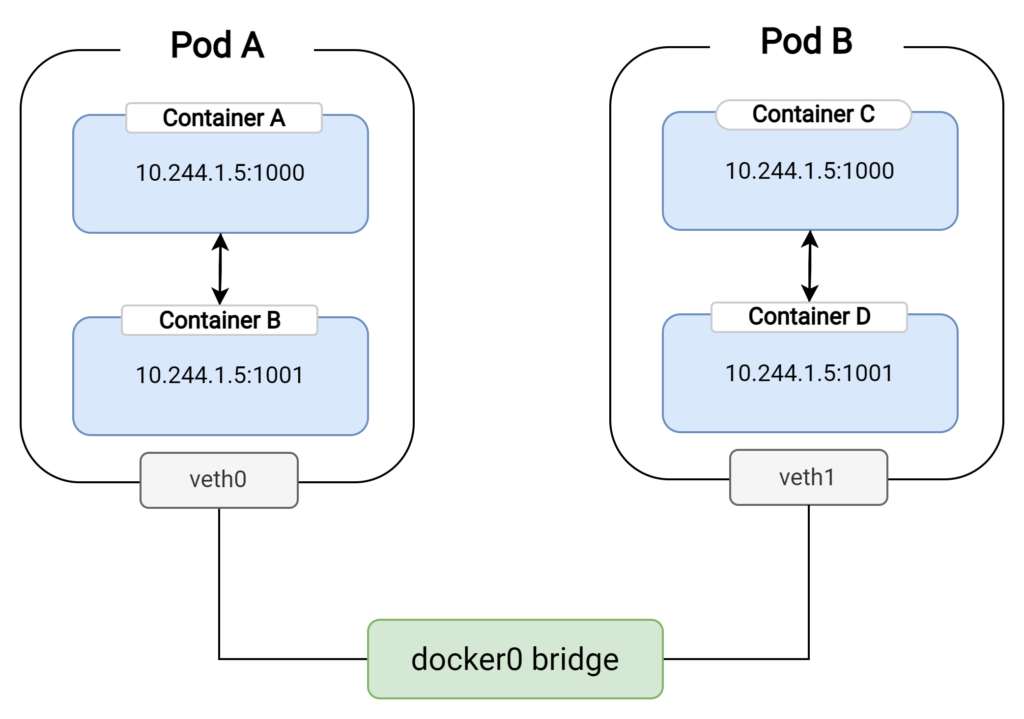
For pods residing on the same node, communication occurs through the host’s network namespace. Each pod’s veth interface connects to a bridge (commonly known as docker0 or cbr0, depending on the container runtime used) on the host. The bridge acts as a virtual switch, enabling packets to be forwarded between the pods’ veth interfaces. It’s essential to understand that the bridge is a crucial component in the communication process between pods on the same node, as it directs traffic between the respective veth pairs.
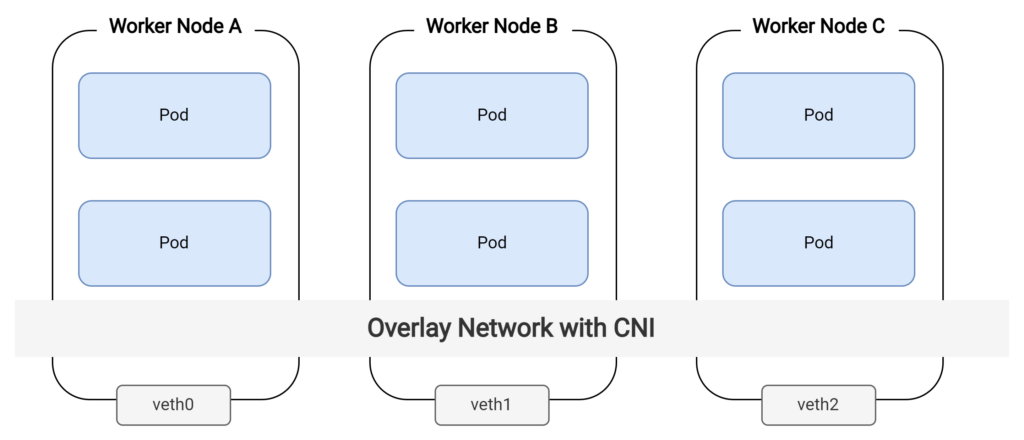
However, when it comes to inter-pod communication across different nodes, the default Kubernetes network setup has limitations. As the docker0 or cbr0 bridges are local to each node, they cannot facilitate communication between pods on separate nodes. In this scenario, an overlay network is required to establish a connection between the pods. An overlay network is a virtual network layer that operates on top of the existing network infrastructure, allowing for communication between pods on different nodes. It is here that the Container Network Interface (CNI) comes into play.
What CNI is and How it Works in k8s
The Container Network Interface (CNI) is a crucial component in Kubernetes networking. As mentioned earlier, it is a standard interface for configuring network connectivity between containers and the host. CNI allows various plugins to provide the necessary overlay network functionality, enabling seamless communication between pods across different nodes.
Overlay networks are virtual networks that operate on top of the existing network infrastructure, creating a layer that enables communication between containers or pods running on different nodes. CNI plugins are responsible for implementing the overlay network, ensuring that traffic is correctly routed between nodes. Some widely used CNI plugins include Calico, Flannel, Weave, and Cilium. Each plugin has its specific features, performance characteristics, and network policy support, making it essential to choose the right one for your cluster based on your needs.
To facilitate communication between pods on different nodes, CNI plugins set up the required network connections, routing rules, and IP address management. When a new pod is created, the Kubernetes node delegates the networking setup to the selected CNI plugin. The plugin then configures the pod’s network namespace, assigns an IP address, and establishes the necessary routes to enable communication with other pods in the cluster. This process ensures that inter-pod communication is seamless, regardless of the node on which the pods are running.
Network Policies
Network Policies are an essential feature in Kubernetes for controlling traffic flow between pods. They define a set of rules to specify which pods can communicate with each other and what traffic is allowed to pass through. This helps in implementing security best practices and ensuring that only authorized traffic is permitted within the cluster. Network Policies act as a firewall between pods, allowing you to enforce fine-grained access controls and protect sensitive workloads.
To illustrate a simple Network Policy, let’s consider a scenario where you have an application with two components: a front-end web server and a back-end database. You want to ensure that only the front-end web server can access the back-end database and that all other communication attempts are blocked.
First, you would create a Network Policy resource using a YAML file:
apiVersion: networking.k8s.io/v1
kind: NetworkPolicy
metadata:
  name: backend-database-policy
spec:
  podSelector:
    matchLabels:
      role: backend-database
  ingress:
  - from:
    - podSelector:
        matchLabels:
          role: frontend-web-server
    ports:
    - protocol: TCP
      port: 3306
In this example, the Network Policy named backend-database-policy selects pods with the label role: backend-database. It allows ingress traffic only from pods with the label role: frontend-web-server and limits the communication to the TCP protocol on port 3306, which is the default port for MySQL databases. This Network Policy effectively isolates the back-end database, ensuring that only the front-end web server can access it.
The example of communication between pods in different nodes
Here’s the example with 2 pods and A pod is trying to communicate with B pod. Let’s take a look into this case.
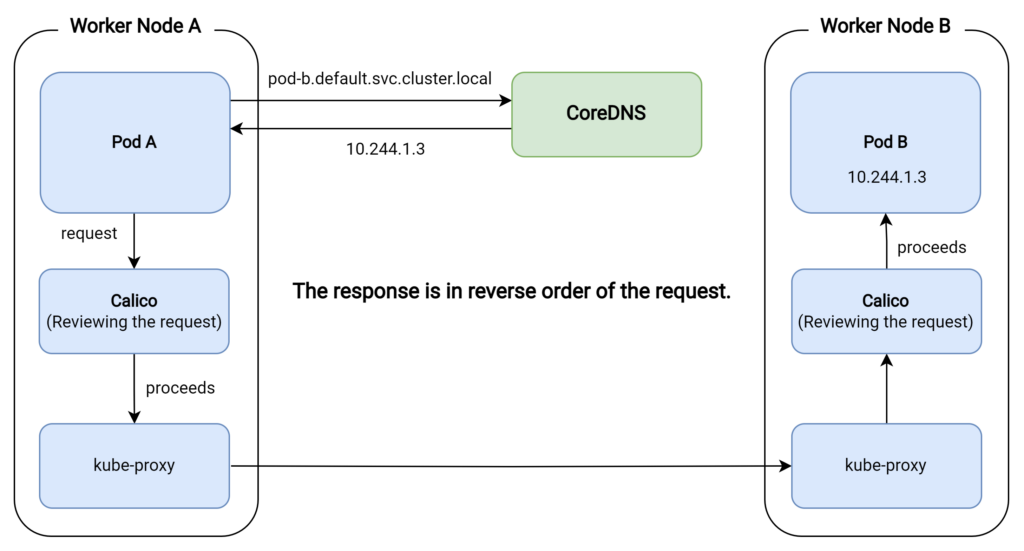
- Pod A sends a request to Pod B using its IP address or DNS name (e.g., pod-b.default.svc.cluster.local).
- The DNS request is intercepted by the internal DNS resolver in the cluster, typically CoreDNS.
- CoreDNS resolves the Pod B DNS name to its IP address (e.g.,10.244.1.3).
- Pod A sends the request to the resolved IP address of Pod B.
- The request is routed through the CNI-managed network (e.g., Calico). Calico ensures that the request reaches the destination node by applying the appropriate network policies and routing rules.
- Network policies are evaluated to determine if traffic from Pod A to Pod B is allowed. If the traffic is allowed, it proceeds; otherwise, the traffic is blocked.
- The request reaches the destination node where Pod B is running.
- Kube-proxy on the destination node forwards the request to Pod B, utilizing iptables or IPVS rules (using netfilter) that match the destination IP address.
- The request reaches Pod B, which processes the request and sends a response.
- The response follows a similar path back to Pod A: kube-proxy on the destination node handles the response, forwarding it back to the source Pod using iptables or IPVS rules.
- The response is again routed through the CNI-managed network (Calico), which ensures it reaches the source node, applying network policies and routing rules.
- Network policies are evaluated again to determine if the traffic from Pod B to Pod A is allowed. If the traffic is allowed, it proceeds; otherwise, the traffic is blocked.
- The response reaches the source node where Pod A is running and is then delivered to Pod A.
This is the flow of the communication process between two pods, Pod A and Pod B, in a Kubernetes cluster. However, you might be confused because we didn’t touch on the concept of Iptables and IPVS rules, along with the netfilter above.
Iptables and IPVS rules, along with netfilter, play a crucial role in the communication process between pods. Iptables is a user-space utility program that allows a system administrator to configure the IP packet filter rules of the Linux kernel firewall, implemented as different Netfilter modules. IPVS (IP Virtual Server) is a transport-layer load balancer that operates on the Linux kernel and supports various load balancing algorithms.
netfilter, a core framework within the Linux kernel, enables packet filtering, network address translation (NAT), and other packet mangling. Iptables and IPVS rules use netfilter to apply the necessary routing and load balancing configurations for Kubernetes networking. In our example, kube-proxy sets up iptables or IPVS rules to forward requests and responses between the source and destination pods, ensuring seamless communication within the cluster.
Conclusion
In conclusion, understanding Kubernetes networking is crucial for deploying and managing applications effectively within a cluster. This article provided an overview of the basic concepts of Kubernetes networking, such as communication between containers in a pod and between different pods, along with the role of CNI and network policies. By gaining a deeper understanding of these concepts, you can better configure and maintain your Kubernetes clusters, ensuring smooth communication between pods and enhancing the overall performance of your applications.